NOTES:
|
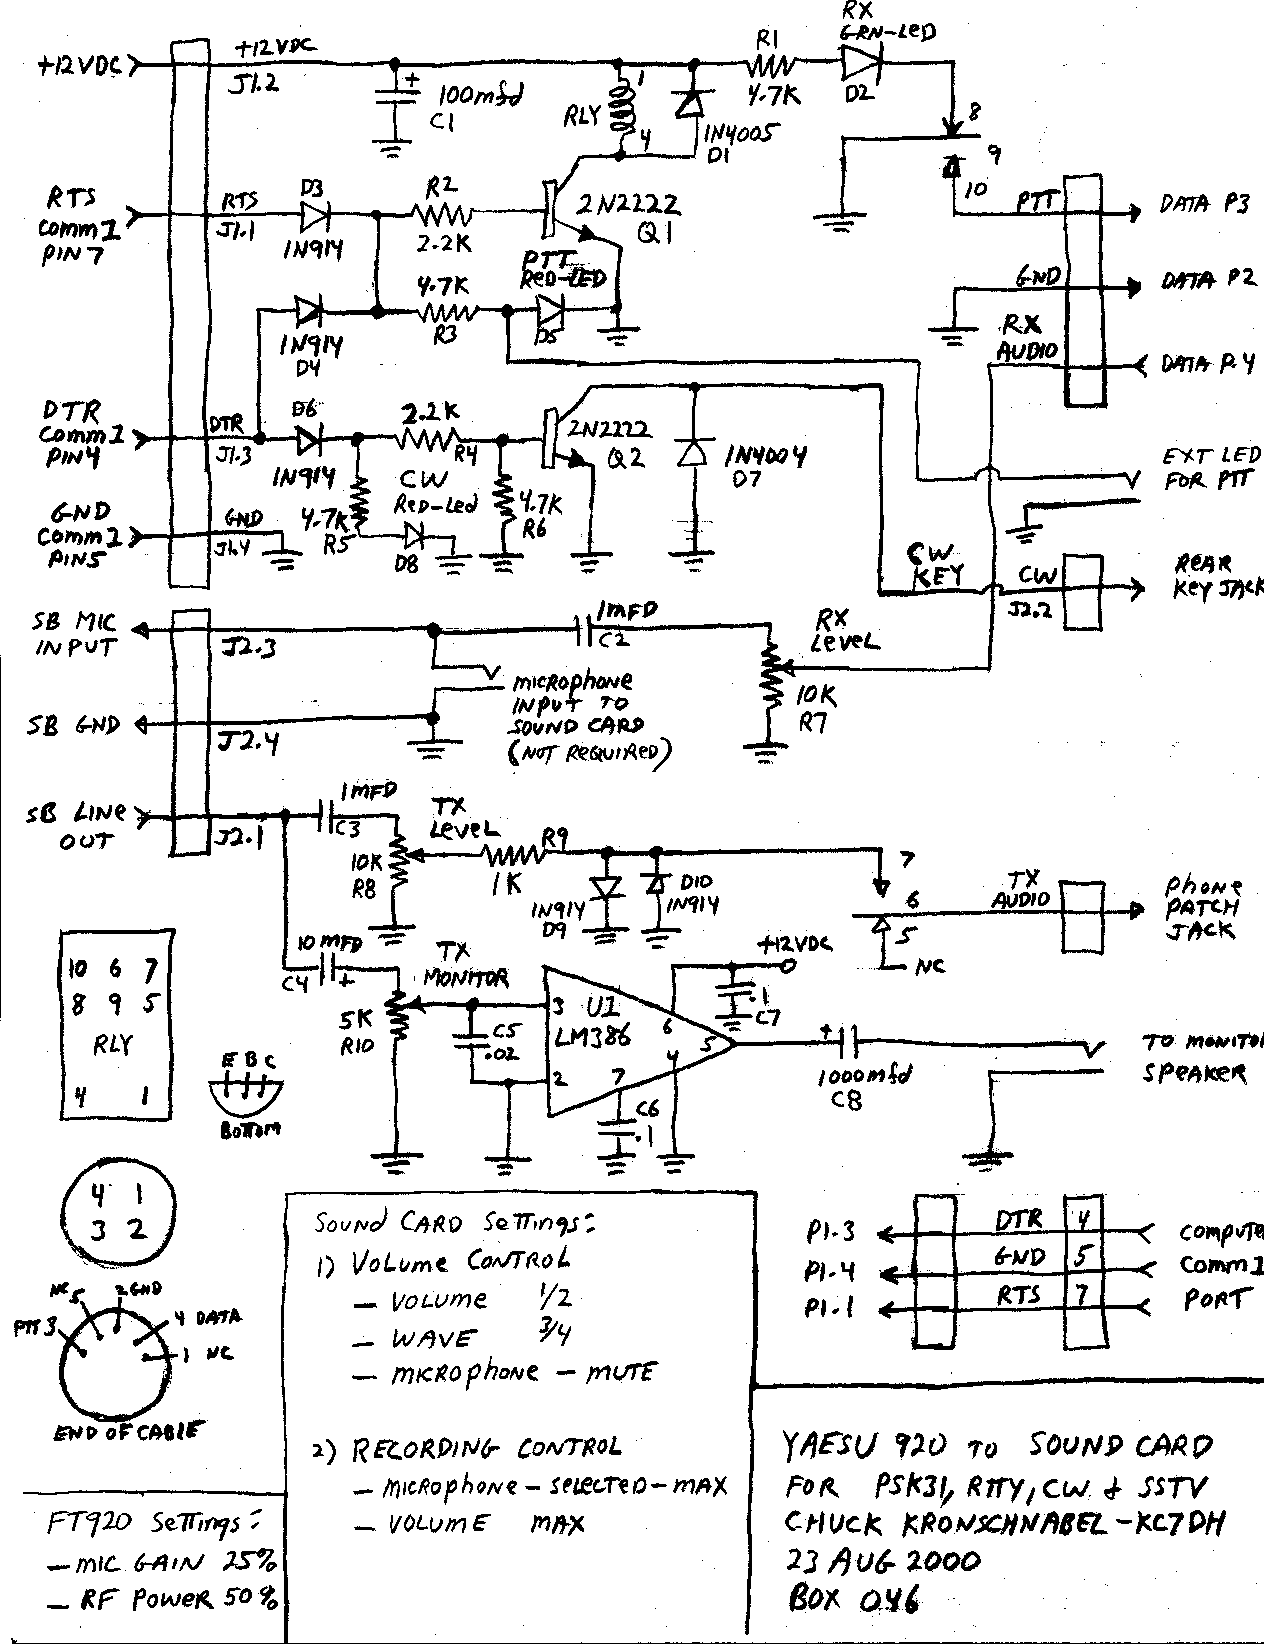
| 1. | I used the Yaesu "Data" port on the original design but had to disconnect the "data in" line and move it to the
Yaesu "phone patch in" jack. I discovered that the data port is only functional in the "data" mode (not in standard modes like
USB and LSB) and the data mode adds information to the "data in" line which causes problems. |
| 2. | The two audio cables leading to the sound card were made about a foot longer than necessary so they could be wrapped
around a "snap-on filter choke" (273-104) near the computer to help keep RF out of the sound card. Be sure to use shielded cable.
|
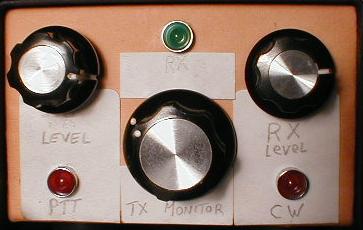
| 3. | The "external LED for PTT" (option) was added because I wanted an indicator right on the monitor to let me know when I was transmitting. I generally turn the sound way down or off while using these new modes and some of them will continue to transmit until you click on the RX button. The LED is mounted on a small flat piece of plastic and stuck on the lower lip of the monitor with a piece of mounting foam tape.
|
| 4. | The "microphone input to sound card jack" (option) was added just to provide normal access to the sound card mic input since this interface was plugged in there.
|
| 5. | The "TX monitor circuit" consisting of U1 and its parts (option) was included to allow the operator to monitor the audio that was being transmitted.
|
| 6. | When setting your preferences for the software programs use RTS for PTT and DTR for CW keying.
|
| 7. | Part placement, part values and part types are not critical so if you have a junk drawer, have at it..
|
| 8. | Be sure you set the "Volume control" and "Recording Control" sliders and "check boxes" for the sound card as noted on the schematic.
|
| 9. | J1/P1 and J2/P2 are 4 pin microphone connectors (274-002 / 274-001) but any connector (or direct wiring) will work.
|
| 10. | To print out the schematic diagram: "right click" on the image, select "save image as..." and type in a file name. Load the file into any paint program and select "print".
|
| 11. | The schematic diagram is in a special file with only two colors which keeps the file very small. You may have colors selected for your Windows or Browser environment which do not match close enough to allow the schematic to be seen properly. Try "right clicking" on the schematic, then save it as a file. When you load the file into any paint program, you should be able to see and print the file. If this doesn't work, let me know and I will email the file to you.
|

